LCD Display

for system display panels see the chapter on Display Panels
The LCD command will display text on a standard LCD module with the minimum of programming effort.
For detailed command reference, see the LCD Commands section.
This command will work with LCD modules that use the KS0066, HD44780 or SPLC780 controller chip and have 1, 2 or 4 lines. Typical displays include the LCD16X2 (futurlec.com), the Z7001 (altronics.com.au) and the QP5512 (jaycar.com.au). eBay is another good source where prices can range from $10 to $50.
To setup the display you use the DEVICE LCD INIT command LCD INIT d4, d5, d6, d7, rs, en
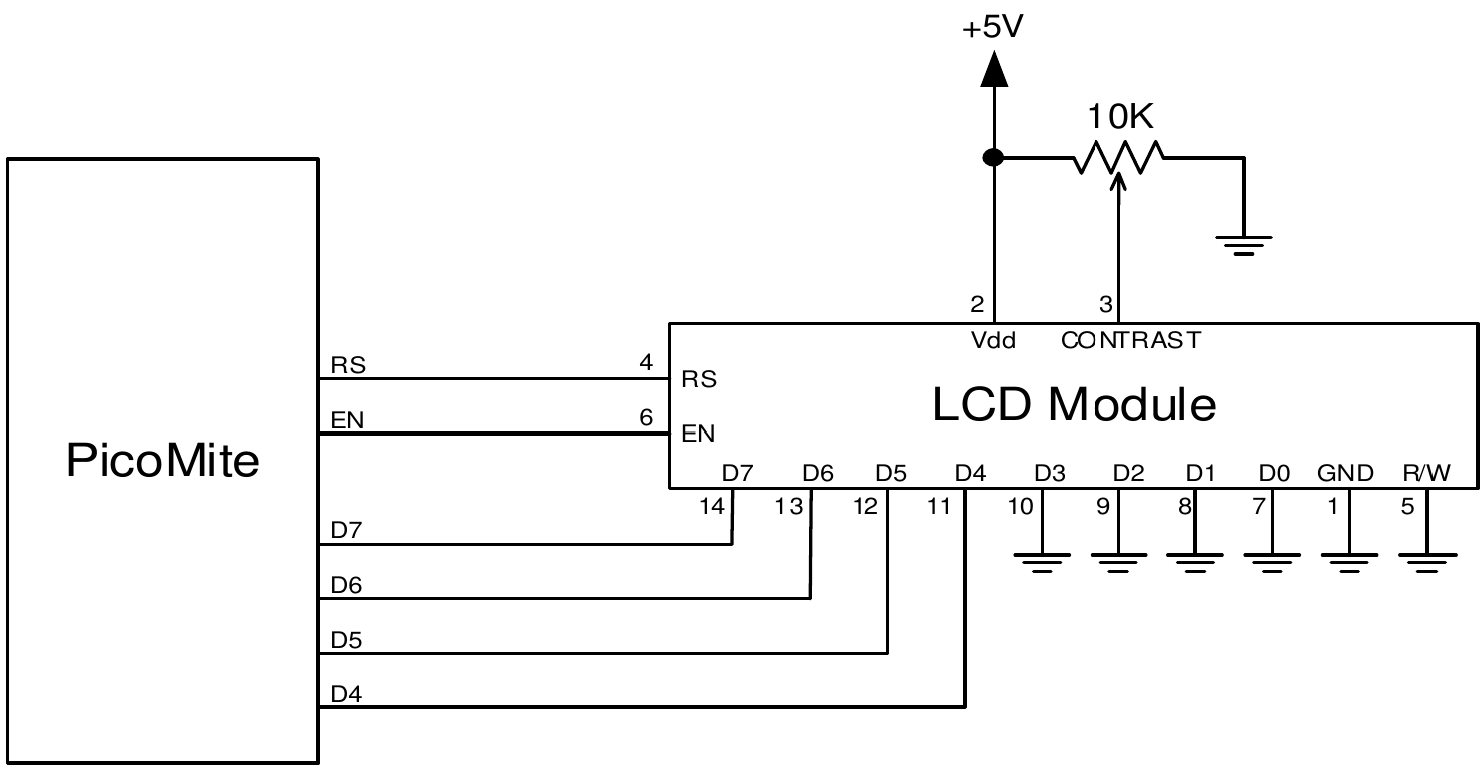
d4, d5, d6 and d7 are the numbers of the I/O pins that connect to inputs D4, D5, D6 and D7 on the LCD module (inputs D0 to D3 and R/W on the module should be connected to ground). rs is the pin connected to the register select input on the module (sometimes called CMD or DAT). en is the pin connected to the enable or chip select input on the module.
Any I/O pins on the Raspberry Pi Pico can be used and you do not have to set them up beforehand (the LCD command automatically does that for you). The following shows a typical set up.
To display characters on the module you use the LCD command
LCD line, pos, data$
Where line is the line on the display (1 to 4) and pos is the position on the line where the data is to be written (the first position on the line is 1). data$ is a string containing the data to write to the LCD display.
The characters in data$ will overwrite whatever was on that part of the LCD.
The following shows a typical usage where d4 to d7 are connected to pins GP2 to GP5, rs is connected to pin GP6 and en to pin GP7.
LCD INIT GP2, GP3, GP4, GP5, GP6, GP7
LCD 1, 2, "Temperature"
LCD 2, 6, STR$(TEMPR(GP15)) ' DS18B20 connected to pin GP15
Note that this example also uses the TEMPR() function to get the temperature (described above).